I hit a few sales with a friend last weekend. This is what I bought. The Kane County Fleamarket is THIS weekend. Hopefully, I'll find a few treasures there, too!
Here's a scan of that bird page that I bought. It would be very nice in a shadow box with a nest and eggs.
If you click on it, it will enlarge. You may save it and print it out to use, if you like.
I also bought this:
Here's the front.
Here's the side.
It's a windmill.
I think I may add it to
a birdhouse. Maybe, I'll
add a bit of steampunk, funk, too!
That's it for now. If I find any "can't live without" treasures at Kane, I'll post them this weekend.
Blog Banner
The blog banner was made with elements from Lorie Davison. The nail head is Mo Jackson, the white rabbit and the key is Tangie Baxter. The butterflies are from Katie Pertiet.
Friday, April 30, 2010
Sunday, April 25, 2010
What we did in the 60's (a tutorial)
No. Not THAT! This is not that kind of a tutorial. If you think that, than shame on you. We made these!
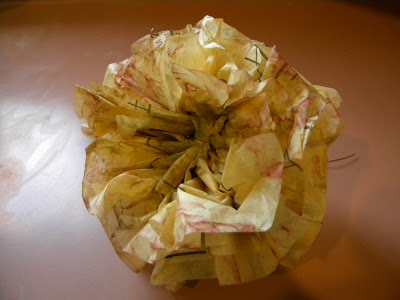
We made these out of colorful tissue or crepe paper. Now I'm seeing these everywhere made out of old sewing patterns. They are quick, easy and you could make these with the kids if you want. Here's what you'll need to get started:
An old sewing pattern.
Wire.
Wire cutters.
Cut the pattern paper into 6 strips.
I cut them about 6 x 12 inches.
More or less depending on the size of
the flower you want.
Cut a piece of wire about 18 inches.
I like to have enough wire to wrap around a
stick or to just anchor it to your candlestick or mantle. These look great everywhere!
Stack the strips one on top of the other, like this.
Now, you are going to accordian pleat these strips. Folding forward and backward. I hope this makes sense. I don't know how else to explain it.
You should end up with something that looks like this. You can leave this as is or round the edges with scissors if you like. Using scissors with a fancy edge makes for a different look also. It's your flower. Go CRAZY!
Fold this in two to find the middle.
This is where you will wrap your wire.
You could also use a chenille stem to wrap around this if you are doing this with children.
Here is the wire all wrapped around. It really doesn't need to be too tight.
Now you start separating the layers. Do this gently to keep the paper from tearing. Separate the layers and pull the paper up and towards the center. The more you work with this the fluffier the flower will be.
You can work from the front and/or the back. There's really no wrong way to do this.
You can add color if you like. I use Pan Pastels. I get them at Dick Blick art supplies. It's a little like chalk and goes on like eye shadow or blusher. In fact, when I bought these the clerk at the counter asked me if I was using it for makeup! Apparently, a lot of the artists are. It's non-toxic and comes in many, many colors. Now, I love a multitasking product as much as the next girl but I'm not sure I really want to go for the clown look. Therefore, I have not actually used these as eye shadow. If you do, please let me know how this works for you!
Here is a close-up of one that I added the pastels to.
All finished and stacked in a bowl! You can add just about anything to the center. These are so darn easy and fun to make. They are rather addicting.
I find old patterns at estate sales, garage sales, the Goodwill, and thrift stores. Actually, since I used to sew a lot I've been using up that boatload of patterns I was always "intending" to make!
Put on your favorite 60's music and start making these. These truly are addicting, but much cheaper and safer than what people were using in the 60's!
Monday, April 19, 2010
Sunday morning. 9 a.m.
A few estate sale finds.
I bought a bag full of old cotton birds. This one is my favorite.
Here he is added to my dining room wall
with some vintage sheet music that I've tacked up.
Then I bought this odd knob thingy.
And...
I added it
to this not old glass display.
Which made this!
Which I turned into a lovely wish jar.
All done! Created for only $5.50!
Subscribe to:
Posts (Atom)


