Happy New Year Everyone!!
The trees are down, the closets in order,
the house is spit-spot.
All right so it isn't.
The trees ARE down though.
And I thought I'd share a little
after the holidays
tutorial
involving
what else...
broken glass.
You will need:
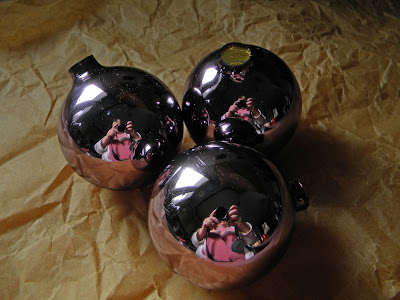
Christmas ball ornaments
Brown paper lunch bag
Large Ziplock Plastic Bag (preferably a freezer bag)
Something heavy.
Not a ball-peen hammer.
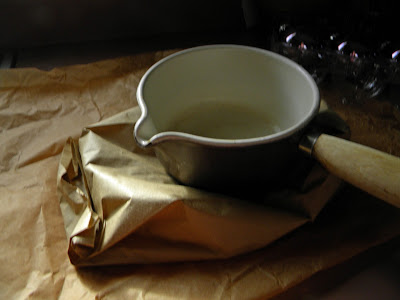
I used a heavy pan.
I'll explain why in a minute.
You can buy Christmas ball ornaments
really, really inexpensively now.
I bought some for fifty cents a box!
Any color works.
They must be glass balls.
This truly is not a craft idea for children.
Cover your work area
(kitchen counter)
with paper.
Remove balls from that swell
plastic shrink wrapped holder
they are tucked into.
This will be the only time you won't care
if they break or not.
Remove the metal lid.
Throw it away.
Unless you can think of a fun craft project
to make with it.
I tried.
Nothing.
Nada.
Zip.
Put the balls (I do 3 at a time but you can do more)
into the brown lunch bag like this:
Do not confuse this with your husband's lunch bag.
He will not be amused.
He will also not understand why you wouldn't
just go to Michael's with your 40% off coupon
and purchase Martha's glitter.
OR
Why you wouldn't just use the glitter that seems to
be multiplying like rabbits in your pantry.
Roll the top down on the bag.
Just like you do for your husband's
or children's lunch bag.
Wait until your husband is taking a shower...
Oh, sorry. That's just at my house.
Take a heavy pan and smash those puppies!
Well, not actual puppies.
The Christmas balls.
You will hear a satisfying snap.
Start smashing the heck out of 'em.
The pan works well because
of the wide surface.
You want to smash the balls into bits.
We'll grind them down even smaller
in a minute.
I take the pan and push down hard
while at the same time sort of rocking it back and forth.
At this point you will want to turn your tv or music up
REAL LOUD
It sounds a bit like fingernails on a chalkboard.
Ignore husband who again wanders through
wondering out loud why the tv is blaring
and why you just don't buy glitter.
The tomb was in the pyramid at the end of a stagnant smelling hallway.
Indiana adjusted his hat and clutched the whip tighter to his side. He ducked his head and started to venture down the ....
Kidding.
It's the paper bag sillies.
Look inside!
See!
Now, dump this into
the large plastic
freezer bag.
You could just start out
with the freezer bag
but the little shards of glass
sort of poke through and it makes
a mess.
Trust me.
This works better.
I also use the handle end of the pan
to smash the bits into
smaller bits.
Keep this up until it's about the size you want it.
I even stand the pan up like this
and roll it back and forth
further smashing the shards
into little glittery pieces.
Tip the glitter in the bag to one side.
Snip the opposite corner off
like so:
It acts as it's own funnel!
My darling daughter taught me this
after I was transferring garlic powder
from a plastic refill bag to a jar.
Well, she offered up this advice
after said garlic powder
was all over the floor.
And you thought that perfume smelled bad?!
Woooooooh DOGGIES!
Anway - back to the glitter.
Fill up your little jar.
You can't tell from the pictures
but this stuff is very sparkly!
Looking at this picture I realize
that some of this is kind of chunky.
It's a nice look
but in all seriousness
this is
broken glass, people!
Please be careful.
Don't smoosh it into the glue with your hands.
But it is kind of fun to use.
And ever so fun to tell friends
that you make your own glitter.
The expression on their face
is
priceless.
And you know
there HAD to be a song.
Broken Glass by Annie Lennox
Have fun and be careful out there.


11 comments:
Excellent tutorial Kathy! You really do crack me up! It's sooo you too- you really have a thing for smashing stuff :) Anyhoo, I've a feeling by the time I go to take out the decorations next year I won't have any baubles left- I'm definitely going to give this a go!
How funny you are and I feel your passion for making your very own glitter. This is so what we crafters have to do! Thanks for sharing your technique. Happy week...
What a unique idea...homemade glitter! Who would have thought...but you, Kathy. I loved the story that went along with it, especially the part where Indiana adjusted his hat and clutched the whip tighter to his side....I love reading your entries.
BlessYourImaginativeHeart
Missed you! What a fun post to peek in on you with :)
I see you're not doing this on the kitchen counter any more... ;-)
The next time a few ornaments crash to the ground, I know how to recycle them thanks to YOU! Awesome tutorial and a very fun post. Anything that features Indiana Jones get my immediate attention and approval!!! Hugs, Terri xoxo
LOL thanks for the clever tutorial and chuckle...
PS I am not that industrious, looking for my online coupon right now LOL
Your directions are entertaining...and really I am fascinated that you made glitter, really? That is soo cool!
Lezlee
Great tutorial! Thanks for sharing!
Kelly
Such an awesome tutorial and you crack me up!! I was laughing the entire way through. I can see this being a very therapeutic craft project right after the holidays. :)
Great idea! Your funny too! Next time I hear "Mom! she broke your vintage ornament" (everyday at x-mas time)I'll be thinking "oh fun-more glitter for me"
Thanks for sharing!
Bella from rosesofyesteryear
Post a Comment